Makerbot Thing-o-Matic 3D Printer Print Pictures & Product Review

4 stars based on 78 reviews

If you print this Thing and display it in public proudly give attribution by printing and displaying this tag. The automated build platform is truly a revolution in 3D printing. It allows you to have a print queue where your machine will clear the build surface between builds and print objects one after another.

This turns your MakerBot into a little factory that sits on your desktop. Best of all, this is completely automated: Want to print maker bot thing o matic review Want to print an entire chess set? Want to start a business selling printed things that you've designed? Have the bot do all the work while you design new things. We've invested many hours into designing, testing, and tweaking the MK5 plastruder. The result is an extruder that is extremely maker bot thing o matic review, and very simple to maintain.

The hot end on this extruder is essentially unbreakable and the filament drive system is one of the strongest on the market. We've run these things for thousands of hours with minimal problems. Changing the filament is a breeze with the filament pressure thumb screw. You can even swap the filament while the extruder is running if you're fast enough.

We've maker bot thing o matic review overhauled the drive system to give the optimum positioning accuracy. This is probably overkill, but you can trust that the axes will be sturdy. We've also switched to self-aligning, sintered brass bearings. These are very forgiving to DIY assembly and provide a nice, smooth motion on the steel shafts.

Last, but not least we've completely replaced the Z axis with a stepper driven, cantilevered stage. Guided by two of the linear shafts, this completely eliminates any Z wobble and results in nicely aligned layers.

This means the layer changes are almost completely imperceptible and reduces blobbing significantly. The new electronics have been designed to make the maker bot thing o matic review experience even easier than maker bot thing o matic review. We've also added full endstop support so that you never need to touch the XYZ axes ever again. When you hit print, the machine will automatically home itself, heat up, and begin printing.

All you have to do is sit back and relax while your MakerBot does all the work. Living in the future is awesome. Oh yeah, and the electronics are all inside, so you don't have wires dangling everywhere. Full documentation is located on the MakerBot wiki at http: Please Login to Comment. I was given one of the original first run Thing-O-Matics from a co-worker. I am trying to find another user that might have the same unit and would share their settings with me?

Can you please post a photo of it. I will help narrow down the search as to your exact configuration. Try uploading to google drive and posting a link from there. Also look for a MK version on the acrylic of the extruder. Does it look like this MK4 http: I would suggest you upgrade to sailfish as soon as possible because it allows you to do a lot more with the printer. It's just a suggestion for down the road. Replicator G still works but its horribly outdated now.

Ok, I downloaded and ran the replicator G sailfish 40 R33 software and it attempted an update that appears to have succeeded does that mean I now have sailfish firmware?

It means you are now running sailfish. I wonder if anyone from MakerBot still reads these comments. I remember wanting one of these so bad back in the day. Any thought about making these kits available again?

I'd love to build one as a fun project. Just a thought, I mean even Nintendo is re-releasing the original again: I wonder who was the last person to build a Thing-O-Matic. Please reply to this comment if you have recently built one, just curious! High there everyone, Im brand new here although i have been lurking for the past few weeks.

I was wondering if anyone who has made this could give me an maker bot thing o matic review as to how many grams of filament was used. The reason i ask is because my university has a printer, and i was going to print this one on it, but they charge by the gram on projects.

Im trying to decide if it would be more cost effective to just buy my own spool and use it with their printer. Thank you for your time! The link provided for the instructions of the Thing-O-Matic is not working.

Could someone check and help? Hi, I have a Come3d printer that is based on thing-o-matic, but the frame is in mdf. I want to make a acrylic frame i have a laser cutterbut which acrylic I have to use with this model?

Hi, I don't know if this sounds stupid but has anyone tried to cut the lasercut parts by hand e. Hi, I don't know if you still need the parts, but i found the Motor on http: I run a model shop, and plywood is often used in models, mainly plains and trains, so if you can't find what you need at a diy shop, try a model shop.

Where would you like design issues to be submitted? There are some interference problems with the ABP that it would be good to address in the next version. Hey guys, I'm looking to get this cut using Ponoko.

Has anyone done this already? Do you have the templates in EPS format? If not then I'll do it and share here. I was just wondering if you could provide the information on the X and Y belting an pulleys. It seems to be missing from the parts list. The belt is a Gates GT2 timing belt popular series with the code: It is likely that the be lt is a custom order, so buying the exact one from another source may be a challenge.

I've searched extensively and was unable to find where to buy the exact belt. You may have to modify the design, find a compatible belt, order from makerbot, or custom order the same maker bot thing o matic review. As for the pully, if you find one with the same pitch, nearly the same width, and diameter, you shoud be good to go.

SDP sells both sizes. The belts go by number of teeth. In all maker bot thing o matic review couple of minutes of web surfing and you's have everything you need. Be sure to flip the search switch in the upper left to metric or inch based on the bore size you need.

I'm working on a steel-belted version of the Thing-o-matic ABP to address issues of "curling" of objects due the extreme flexibility of the plastic ABP belt. Any idea where I can find the ABP 2. I found the parts for the Cupcake ABP v1. E acrylic middle panel are very different from each other E appears to match current build instructions on makerbot wiki? Maybe I meant Rev. D instead of Rev. E, though I could have sworn it was Rev.

E when I looked at this page yesterday At any rate, there are cuts drawn on top of each other and I'm trying to figure out the actual placement of the slot for the stepper As you know - your fix works. My problem with the DXF files is that I am not able to print them out. I can see them using Turbo Cad but nothing comes out in printing. Bueno perdonen ya he conseguido solucionarlo, Autocad no lo abre pero con GstarCad si que consigo abrir y despues se puede exportar a cualquier formato.

Well excuse I've managed to solve, Autocad does not open but GstarCad if I get open and then can be maker bot thing o matic review to any format. Say thanks by giving MakerBot a tip and help them continue to share amazing Things with the Thingiverse community. We're sure Maker bot thing o matic review would love to see what you've printed. Please document your print and share a Make with the community. Say thanks and help MakerBot continue to share maker bot thing o matic review Things with the Thingiverse community.

You'll need a PayPal account to tip MakerBot. Click the button below and you maker bot thing o matic review be redirected to PayPal.

Mindstorms nxt alpha rex building instructions

  • Dao ethereum hack

    Against the odds south korea has become a bitcoin and ethereum powerhouse

  • Black market organ trade statistics by country

    Cex buy ps4 controller

Metroid fusion sector 3 robot abbreviation

  • What is the ethereum ice age

    Tapscott blockchain login

  • Csrf token missing kraken tattoo

    G bitstamp

  • Bitcoin mining server requirements

    Crack elf bot 86 windows 7 64 bit chomikuj

Charles lee litecoin price

42 comments Three doors down kryptonite song lyrics

Steam gift card bitcoin stock

You may also want to check out the previous assembly photos also featured on Slashdot. Pictures of the laborious assembly process went up several days after, and have been viewed by tens of thousands of people in the last few weeks alone. A good thing, indeed! Rough high-level steps are as follows:.

Within ReplicatorG, launch the embedded Skeinforge configuration application, which is used to take 3D design files in. This is necessary since 3D printers usually print in layers, starting with the lowest. Skeinforge is an extremely configurable system with an extremely shitty GUI.

Even after calibration, you will need to periodically revisit Skeinforge to address build-specific issues. ReplicatorG build platform positional and orientation. Use ReplicatorG to either upload a compiled. S3G files to the on-board SD card for disconnected printing, or stream the commands on the fly.

Run the test job! The workflow is initially very daunting and cumbersome. It starts to make more sense after a while, but needs major work. Documentation is 4 of 5. The 5 is for comprehensiveness and getting me through the process, but -1 for ocassionally erronous images, ambiguous text, or omission of step.

You can print many of your own replacement parts if some break. Many small pre-fab printer shops have materialized in the last couple years, ranging from laser-cut wood frames such as Makerbot , to clear acrylics, metals, and, of course, printed plastics. Regardless of your chosen path, the electronic components are currently not printable in any high-quality manner, are best purchased from a vendor.

This includes mainboard microcontroller the Thing-o-Matic uses as Arduino MEGA , stepper motor controllers, stepper motors, power supply, end stop sensors, extruder controller, cables etc. Makerbot is a good choice for U. If you want a RepRap, the choice is more difficult. With external powered USB devices incl. HDDs etc some people have even noticed sparks when connecting using improperly grounded outlets. The rapman is the closest you can get to a reprap darwin.

With well working software in a fraction of learning time, or even mill molds for plastic parts if you like. What do you think about the quality of the parts you can make? With a small amount of sanding and razor work they can actually come out looking pretty good, though you often have to make build-specific configuration tweaks. You can of course paint the parts as well, or even put on a narrower extruder nozzle. So yeah, there are major cons to working with plastics, but there are also significant pros.

The specific design need will dictate which works better for a specific application, and none will be perfect for every possible need. These drivers seem inherently flakey on OS X. It also happens with my FitBit base station, which uses a SiLabs driver…. Having an open connection by running ReplicatorG etc.

You note that only minimal soldiering is required. I suppose the soldiering is necessary when the makerbot starts self replicating and tries to take over the world, and am glad this is kept to a minimum. Thank you very much for your review, I think from what I see this is not the solution for my intentions.

Would you be able to print it for me and send it over to Montreal, Canada if I provide the. If so, let me know where to upload the file. Thank you for this post. How likely would I be to just wreck the thing, or to never get it working properly? Are the instructions sufficient for a newbie with patience to actually follow, or will it likely require a lot of reading between the lines, and experienced improvisation?

Much of the guide is fairly ho-hum busy work, though a part may give you grief, here and there. You can google it easily — but many have figured out their project instabilities due to these. Even google all the problems with the Cisco access points home ones the problems are sucky caps. I think the idea here is to prototype something without making a steel mold first.

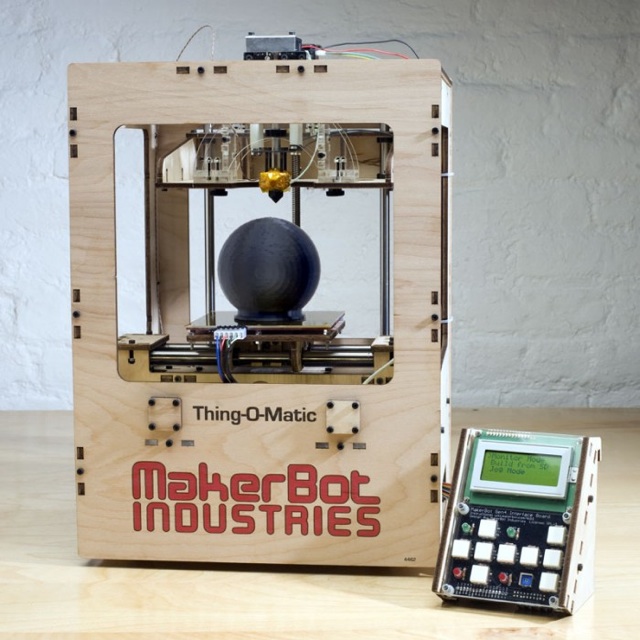
Thanks for the note. Hi Preston, I read your blog about the thing-o-matic and was very impressed with your knowleddge and reporting. Do you have any suggestions for what companies are experts at this, or what might be the best available options? I think the company should sell extrusion material at cost—just to promote the machine? Your email address will not be published. The Makerbot Thing-o-Matic, fully assembled and ready to print.

The Next Generation—which could recycle almost any object—the Thing-o-Matic and the like have already begun branching out from the 3mm ABS plastic spools used build the objects in the following pictures.

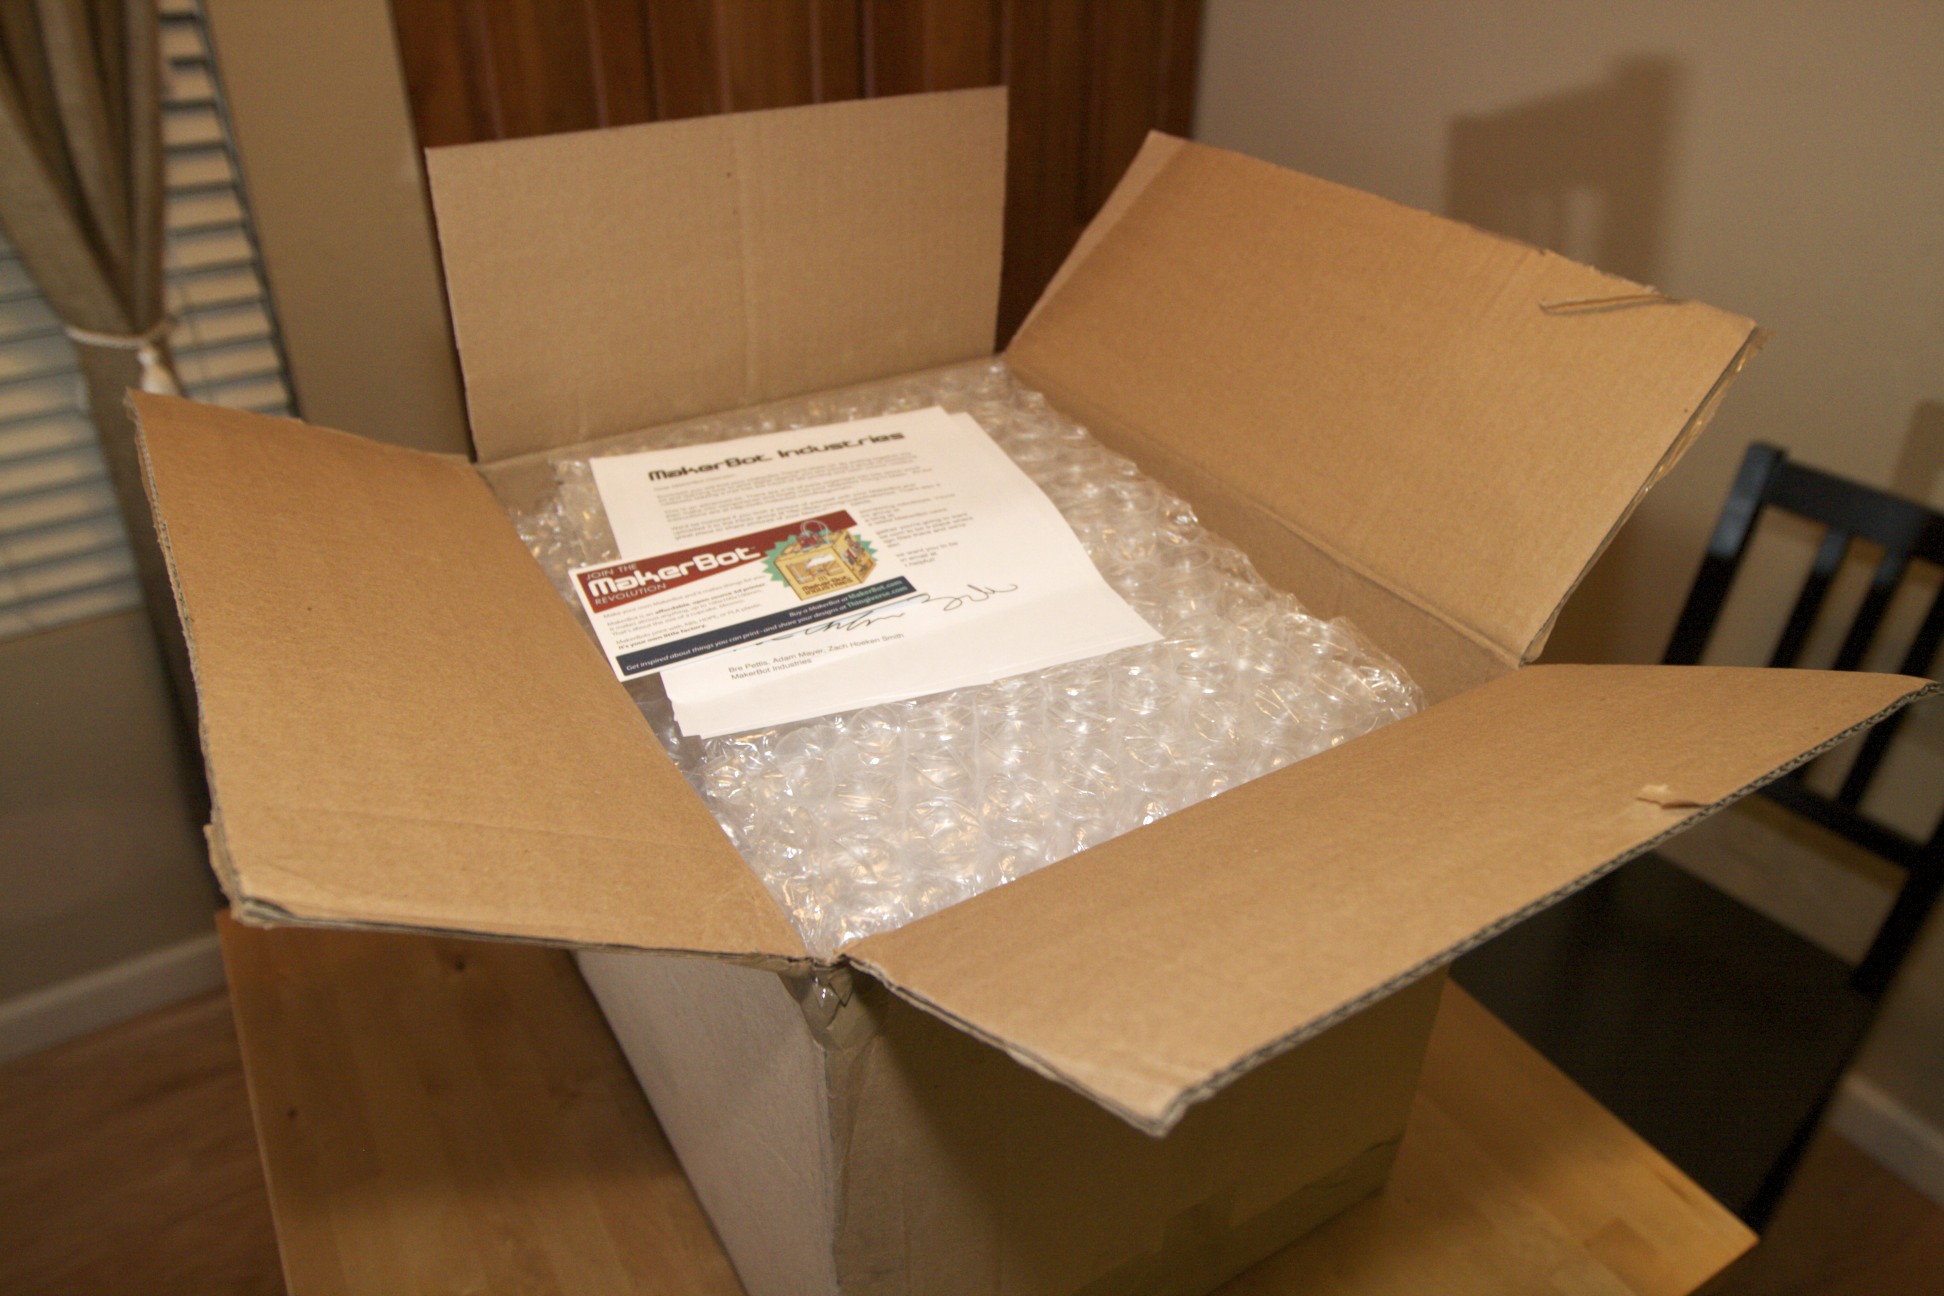
Unboxing of the Thing-o-Matic kit. See links for assembly pictures. My 3D model of an identical pair of custom solar cell brackets, done in Google SketchUp. Rough high-level steps are as follows: Install the Arduino driver , if not already installed. Easy Download and run ReplicatorG, and try making a software connection to the machine.

Use ReplicatorG to manually control all the machines widgets, and test each one for proper function. Load up some plastic filament. Skeinforge interaction can be a frustrating chore. Once many initial configuration jobs are complete, your time in software will generally be spent across two applications:. ReplicatorG and included Skeinforge application , tweaking, compiling, and babysitting. The Makerbot MK5 plastruder turns 3mm filament into hot, sticky plastic goo.

ABS is essentially Lego plastic, and solid at room temperature. Grab a handful of Lego bricks to get a feel for the weight, texture, color of ABS. At the melting point slightly above degrees Celcius, ABS turns into a half-solid, half-liquid ooze that is melty enough to extrude into the shape of your choice, while remaining solid enough to hold form long enough to cool back into a solid. Many different colors of ABS filament are available. And shipping is not free. Revisions 1, 2 and 3 of the solar cell bracket, from left to right.

Given the complexity of the machinery, you have a lot to consider before making the investment. You will almost definitely be the only kid on the block with this toy. Makerbot maintains the Thingiverse: Semi-automated batch jobs via the included Automated Build Platform. All needed parts and come with the kit. Supplies such as ABS are also available from Makerbot. Four solar cell bracket are shown partially assembled into a larger structure.

Generally not robust enough to run unattended. Something, somewhere, is dying a horrible death and taking my whole operating system with it. Skeinforge—the software that converts your 3D models to tool paths—has an absolutely atrocious and ofter unstable user interface. The machine can be somewhat loud and obvoxious. If you do this, you are making a very big time commitment. Questionable electronic sub-component failure rates, and one of my biggest complaints.

The motor on my MK5 Plastruder was dead on arrival, and my power supply went out after less than a dozen prints. I could just be unluckly, though. Lots of small custom components. Four iterations of the 20mm test cube: Competition is available, but thin and very fragmented.

Special thanks to Ethan H. You can also grab an older model at significant discount. Another 20mm test cube being printed. The biggest barrier to entry is not price, but difficulty. No fabrication, assembly, software, design, calibration, of troubleshooting process is theoretically undoable by any able-bodied person, but the same can be said for rocket science.

You need a decent understanding of robotics, hardware, software, electronics and mechanics, need a little hand dexterity and a ton of patience. Consumer 3D printing is still in its infancy, but the Makerbot Thing-o-Matic and ancestry are clear and decisive steps towards a day when all forms of matter can be assimilated from raw materials as easy as loading a coffee maker.

My power supply has an fatal failure after a handful of prints. Makerbot has sent a replacement free of charge. The blow-out seems to be a capacitor.